Lab 3 – Configuring Hybrid Defender DDoS protection
Task 1 – Disable Device-Level DHD DoS Protection
In this lab you will disable device-level DoS flood protection, and then issue an ICMPv4 flood and review the results.
PuTTY to the BIG-IP CLI (10.1.1.245) and resize window by making it wider. Login with root/f5DEMOs4u.
At the config prompt, type (or copy and paste) the following command:
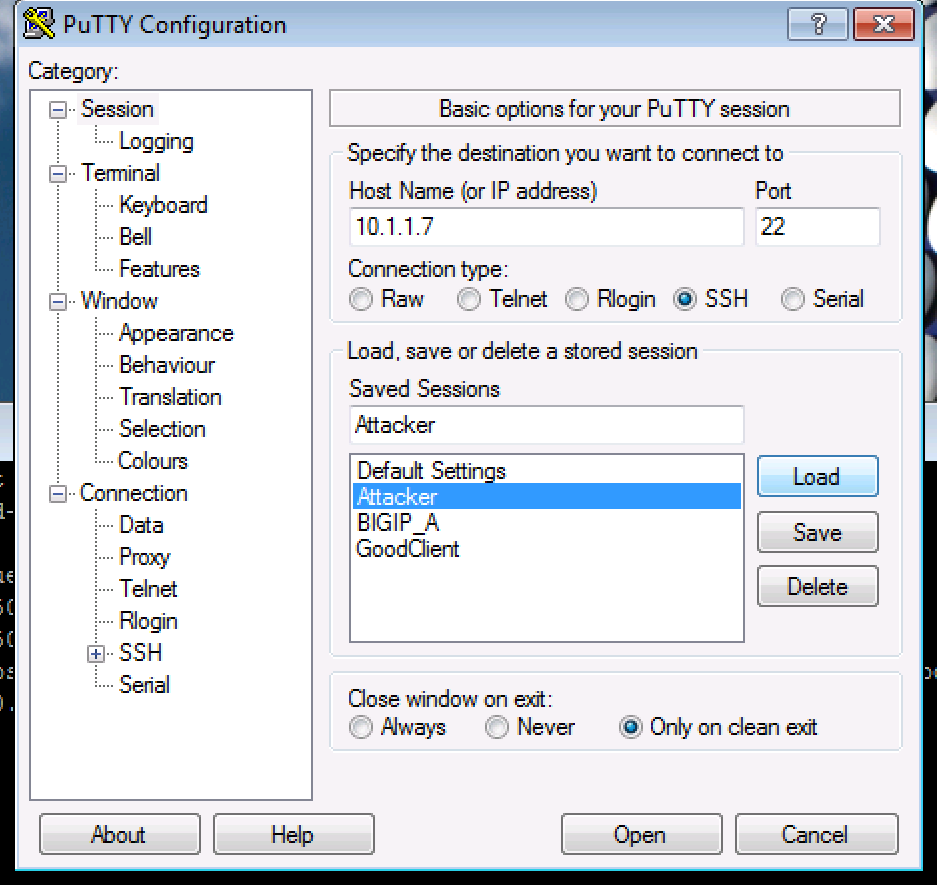
tcpdump -i 0.0Open a second PuTTY window and Load the Attacker Saved Session at 10.1.1.7 and log in as ubuntu. I’t will use a pre-loaded public key as the credentials.
At the config prompt, type (or copy and paste) the following command:
ping 10.1.20.12
The attacker can successfully communicate with a back-end resource behind the BIG-IP DHD.
- Examine the tcpdump window and verify ICMP packets are flowing through the BIG-IP DHD.
Note
The listener for the ICMP packets is the VLAN group.
Cancel the
pingcommand, then verify thetcpdumpstops receiving ICMP packets, and then press Enter several times to clear the recent log entries.In the Configuration Utility, in the DoS Protection, Quick Configuration, Device Protection section click Device Configuration.

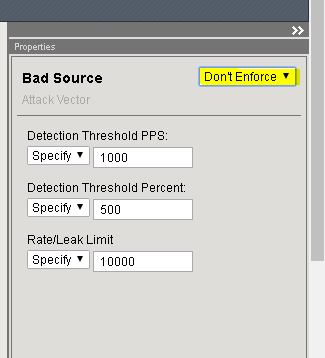
In the Bad Headers row click the + icon, and then click Bad Source.
On the right-side of the page select the drop-down to “Don’t Enforce”
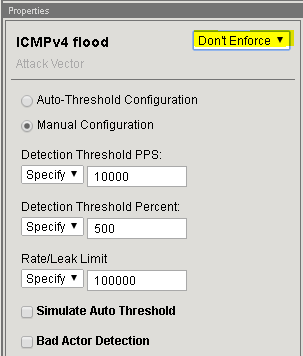
In the Flood row click the + icon, and then click ICMPv4 flood.
Note
If you minimize by clicking the + icon, it will make seeing the other sections easier.
On the right-side of the page select the drop-down to “Don’t Enforce”
- Apply the settings above for TCP SYN flood and UDP Flood., and then click Update.
On the Jumpbox in the Attacker PuTTY window type (or copy and paste) the following:
# sudo su
# cd scripts
# ls
Note
Ignore the “unable to resolve host Attacker message”
These are the different scripts we’ll be using during the exercises to simulate DoS attacks.
Type (or copy and paste) the following commands:
for i in {1..10}; do ./icmpflood.sh; done
This script launches 1,000,000 ICMP requests and then repeats for a total of ten occurrences.
View the
tcpdumpwindow and verify that ICMP attack traffic is reaching the back-end server.Let the attack run for about 15 seconds before moving on.
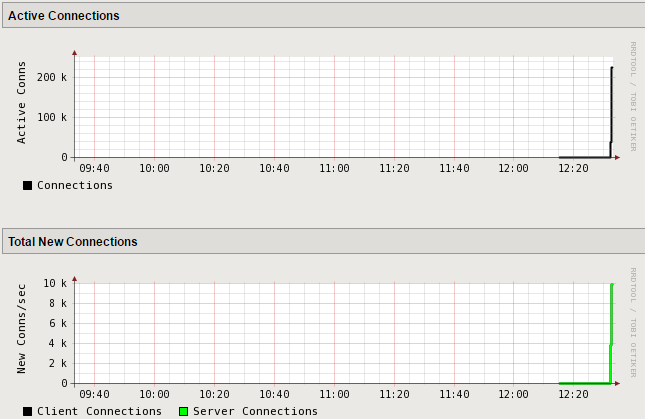
In the Configuration Utility, open the Statistics > Performance > Performance page.
View the Active Connections and Total New Connections charts.
There is a drastic spike in active connections.
View the Throughput (bits) and Throughput (packets) charts.
There is also a drastic spike in both bits per second and packets per second.
- Open the Security > Event Logs > DoS > Network > Events page.
The log file is empty as we disabled device-level flood protection on BIG-IP DHD.
- On the Jumpbox Attacker shell slowly type Ctrl + C several times
until back at the
scriptsprompt.
Task 2 – Re-enable Device-Level DHD DoS Protection
In this task you will re-configure device-level DoS protection, and then issue an ICMPv4 flood and review the results.
In the Configuration Utility, in the Device Protection section click Device Configuration.

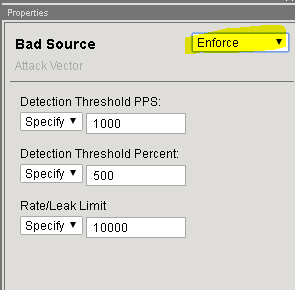
In the Bad Headers row click the + icon, and then click Bad Source.
On the right-side of the page select the drop-down to “Enforce”
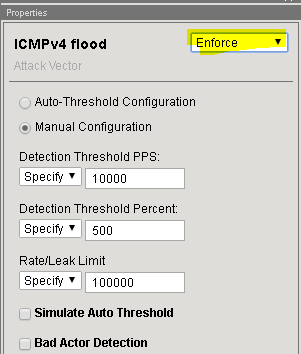
In the Flood row click the + icon, and then click ICMPv4 flood.
On the right-side of the page select the drop-down to “Enforce”
Click Update.
Note
This returns the configuration back to factory supplied device level enforcement.
On the Jumpbox in the Attacker A PuTTY window re-run the following command:
for i in {1..10}; do ./icmpflood.sh; doneLet the attack run for about 15 seconds before moving on.
In the Configuration Utility, open the Security > Dos Protection > DoS Overview > page
You should see the attacks and statistics. Explore the sections

In the Configuration Utility, open the Security > Event Logs > DoS > Network > Events page.
Note
You may need to refresh this page several times before the log files display.
- Sort the event by Time in descending order.
There are now log entries showing dropped packets.
- The DoS Source is Volumetric, Aggregated across all SrcIP’s, Device-Wide attack, metric:PPS.
- The type is ICMPv4 flood.
- The action is Drop.
- On the Jumpbox Attacker shell slowly type Ctrl + C several times
until back at the
scriptsprompt.
Reset the Device-Level ICMPv4 Flood Settings
In the Configuration Utility, open the DoS Protection > Quick Configuration page and click Device Configuration.
In the Flood row click the + icon, and then click ICMPv4 flood.
On the right-side of the page configure using the following information, and then click Update.
Detection Threshold PPS Infinite Rate/Leak Limit Infinite
Task 3 – Configure Protected Object-Level IPv4 Flood DHD DoS Protection
- In this task you will configure object-level DoS IPv4 flood protection, and
- then issue an ICMPv4 flood and review the results.
On the Protect Objects page, in the Protected Objects section click Create.
Configure a protected object using the following information, and then click Create.
Name ServerNet IP Address 10.1.20.0/22 Port * Protocol All Protocols Protection Settings: Action Log and Mitigate Protection Settings: DDoS Settings IPv4 In the IPv4 row click the + icon, and then click ICMPv4 flood.
On the right-side of the page configure using the following information, and then click Create at the bottom of the page.
Detection Threshold PPS Specify: 1000 Detection Threshold Percent Infinite Rate/Leak Limit Specify: 1000 On the Jumpbox in the Attacker A PuTTY window re-run the following command:
for i in {1..10}; do ./icmpflood.sh; doneExamine the
tcpdumpwindow to see if there are any ICMP packets hitting the back-end server.Let the attack run for about 30 seconds before moving on.
In the Configuration Utility, click DoS Protection > Quick Configuration > ServerNet, and then in the IPv4 row click the + icon.

Open the Security > Event Logs > DoS > Network > Events page.
The DoS Source is Volumetric, Aggregated across all SrcIP’s, VS-Specific attack, metric:PPS.
The context column displays /Common/ServerNet, identifying this is protected object-level protection.
The action is Drop.
The difference between packets in per second and dropped packets is roughly 1000.
On the Jumpbox slowly type Ctrl + C several times until back at the
scriptsprompt.In the BIG-IP PuTTY window type Ctrl + C to stop the tcpdump.
Task 4 – View the DoS Visibility Page
- You can now use the new DoS Visibility page to view statistics about the
- DoS attacks you submitted during this exercise.
Open the Statistics > DoS Visibility page.
Note
It may take a couple of minutes for the correct data to display.
In the Attack Duration window there are several attacks.

Mouse over several of the attacks to get additional details of each attack.
Scroll down in the left-side of the page to view the Attacks section.
You can see the number of high, moderate, and low attacks in addition to the types of attacks (HTTP, DNS, Network) and the severity levels.
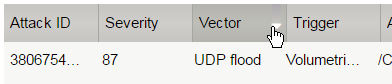
View the details at the bottom of the Attacks section.

This table displays details of each attack that has occurred.
Sort this table by Vector.
Scroll down in the left-side of the page to view the Virtual Servers section.
You can see the details of device-wide attacks (Device Level) and protected object-level attacks (/Common/ServerNet).
- Scroll down in the left-side of the page to view the Countries section.
- View the details at the bottom of the Countries section.
This table displays the attack details from each country.
View the various widgets in the panel on the right-side of the page.
Click Network to filter out only the network-level attacks (all the attacks so far have been network-level).

If it’s not already expanded, expand the Virtual Servers widget, and then select /Common/ServerNet.
This filters the results to only attacks at this protected object-level. Notice the changes to the map on in the Countries section.
Click /Common/ServerNet to remove the filter.
Drag the resize handle on the right-side of the main window as far to the left as possible.

Expand the Vectors widget, and then select ICMPv4 flood.
Expand the Client IP Addresses widget.
Question: How many client IP addresses contributed to this attack?
Expand the Countries widget.
Sort the countries by Dropped Requests.
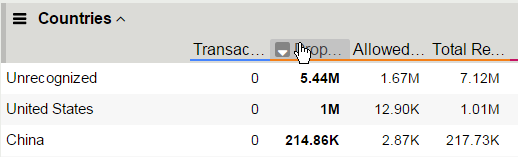
Select China, and then view the changes to both the Client IP Addresses widget and the map.
At the top of the page open the Analysis page.
Note
The requests are still filtered for the ICMPv4 flood results for China.
Drag the resize handle on the as far to the right as possible.
Examine the Avg Throughput (Bits per second) graph.
Place your mouse over the peak in the graph.
Question: What is the Average client in throughput during the attack?
Feel free to examine more of the Dashboard page and the Analysis page.