Hybrid Defender Setup
Getting Started
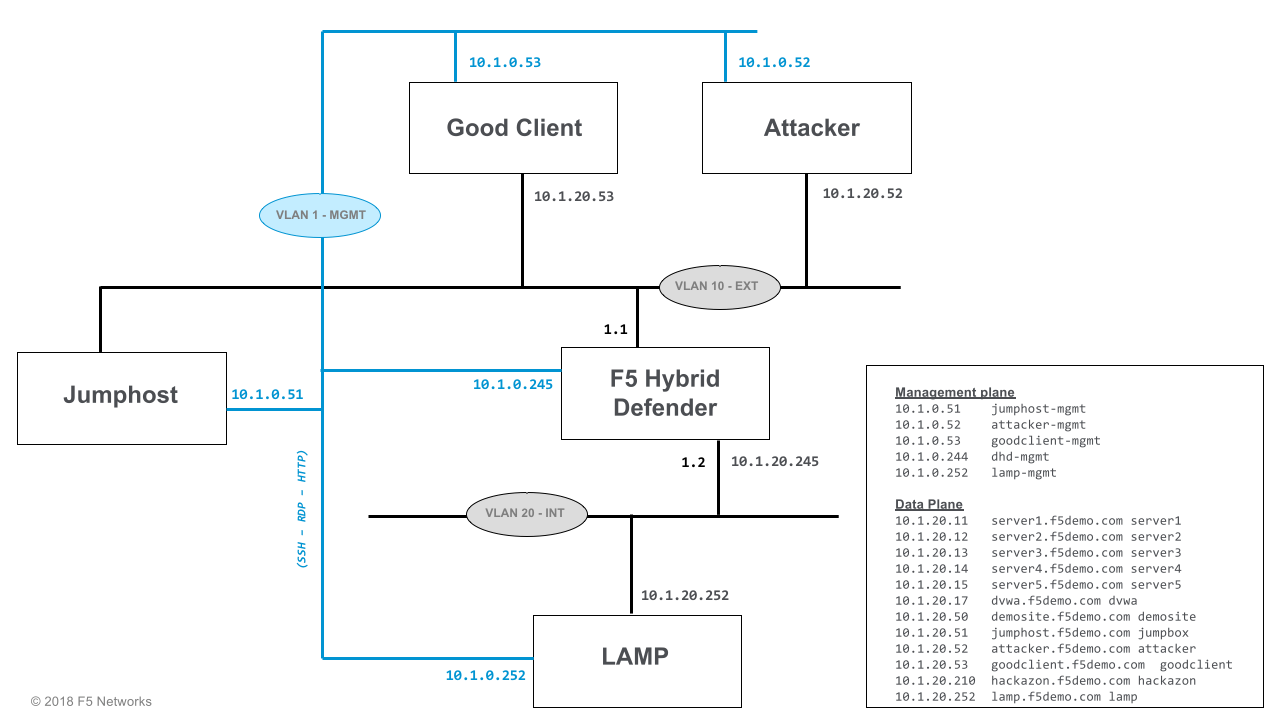
Lab Diagram
Note
You may have noticed that although clients (goodclient, attacker) and server (LAMP) are siting at the same network subnet [10.1.20.0/24], they’re in different VLANs actually (internal - ID 20 vs external - ID 10). Those two VLANs will be grouped toghether (VLAN Group) and act like a single Layer-2 broadcast domain.
Networking Info
IP addressing, Out of Band management, and credentials for all components:
Component VLAN/IP Address(es) Credentials jumphost
- Management: 10.1.0.51
- internal: 10.1.20.51
f5student/[will be provided]attacker
- Management: 10.1.0.52
- internal: 10.1.20.52
f5student/[will be provided]goodclient
- Management: 10.1.0.53
- internal: 10.1.20.53
f5student/[will be provided]lamp
- Management: 10.1.0.252
- internal: 10.1.20.252
f5/[will be provided]F5-DHD
- Management: 10.1.0.244
- internal: 10.1.20.244
root/[will be provided]
Accessing the lab environment
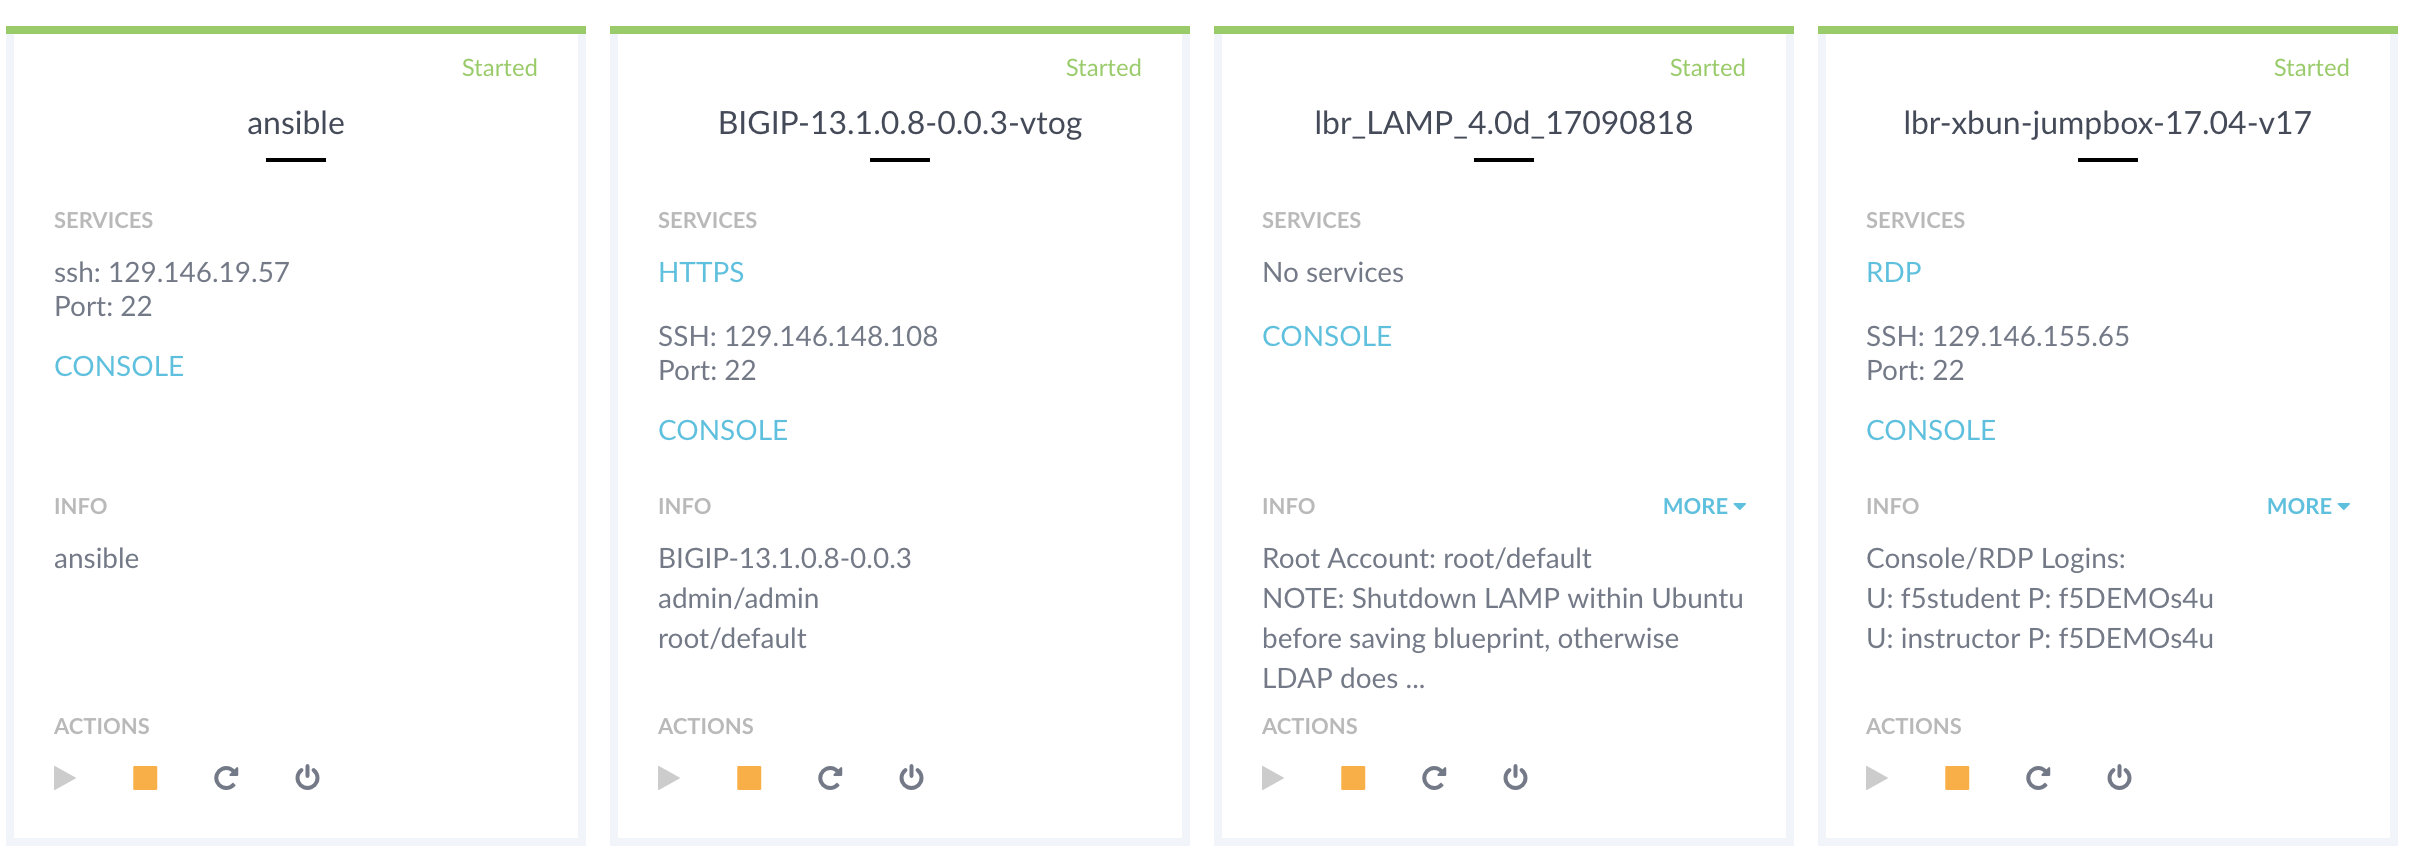
Open a browser and go to http://training.f5agility.com, then enter your Class# and Student# as provided by your instructor.
Look for the jumphost virtual machine. Use the RDP client of your choice and work from there, you are going to use it for all labs.
Hint
You can use either use the PUTTY client provisioned on your jumphost desktop, or native shell prompt in order to access both goodclient and attacker virtual machines. Private keys have been configured in advance so you won’t need passwords. A few scripts require root access. Don’t forget to sudo before running attacks, baselines, etc.
Run the following scripts from both goodclient and attacker hosts. It’s going to sync the tools to be used in the entire lab.
~/update_tools.sh
Re-License your DHD Device
Important
For Silverline device registration to function properly the Hybrid Defender device must have a unique device ID, which is comprised of unique attributes like Base MAC and registration key.
For the following steps please use the registration key provided by your instructor.
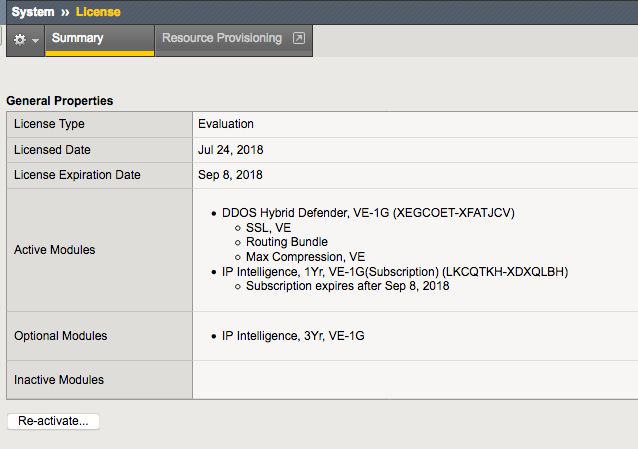
Go to System->License and then click on Re-activate.
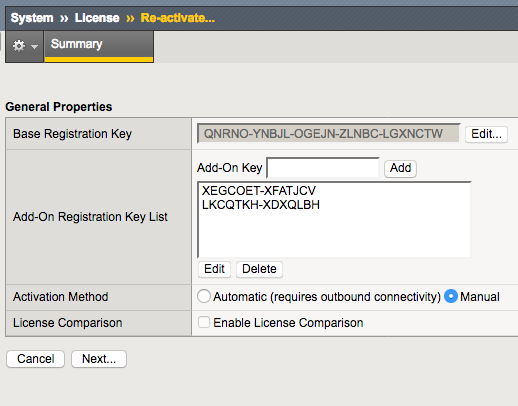
Edit the Base Registration Key, replacing it by the new license key. The Activation Method option must be manual. Then click Next.
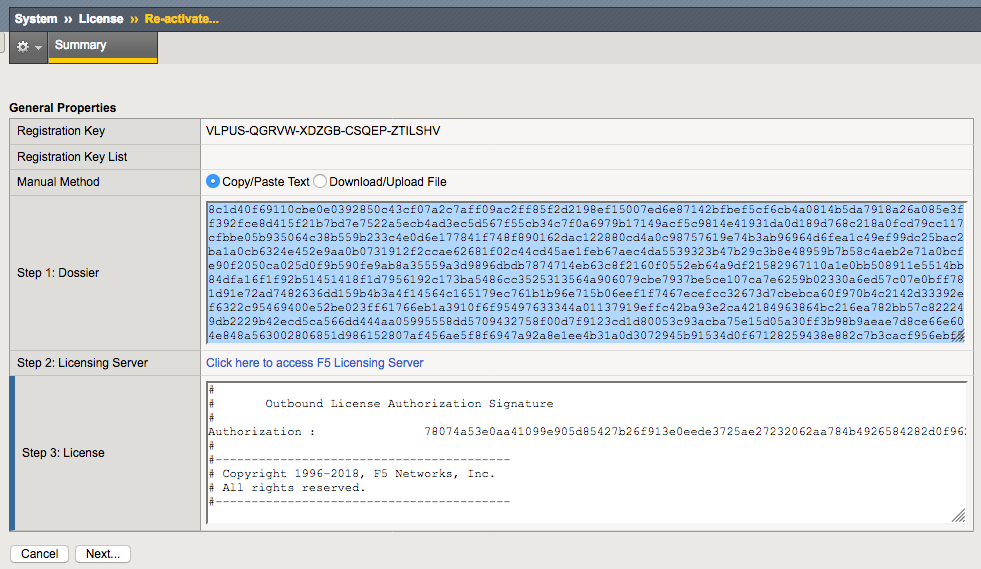
Select all in the Dossier frame and copy it. Click on Click here to access F5 Licensing Server.
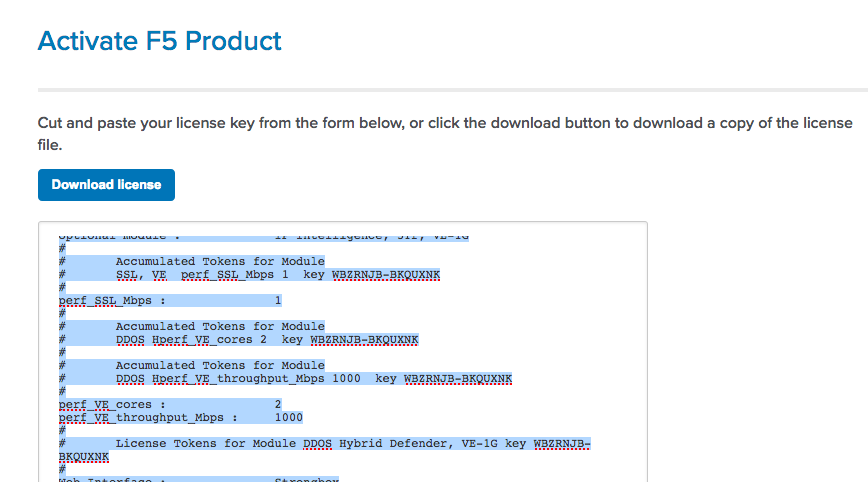
Agreee with the contract terms, copy the contents in the license frame, then click Next ”.
Go back to your F5 DHD and paste the contents copied from the above. License and click Next.
Hint
The BIG-IP will restart daemons and a window will pop up indicating system configuration has changed. Please wait for it to reconnect and click Continue. Your device is now licensed. Click Next

Perform Initial DHD Network Configuration
- In the BIG-IP Configuration Utility, open the DoS Protection-> Quick Configuration page.
- Open the Network Configuration page, then In the Default Network section click defaultVLAN.
- Configure the Default Network settings as follows, the click on Done Editing
Internal VLAN tag: blank Internal Interfaces: 1.2 (Click untagged/Add) External VLAN tag: blank External Interfaces: 1.1 (Click untagged/Add) IP Address/Mask: 10.1.20.244/24
- In the Routes section click Create.
- Configure the route using following information, and then click Done Editing, and then click Update.
Route name: default Destination: 0.0.0.0 Netmask: 0.0.0.0 Gateway Address: 10.1.20.2
- By this time you should be able to reach the LAMP server from both attacker and gooclient machines. Open up a terminal shell with both machines and confirm the can reach out to the LAMP server before moving forward.
f5student@attacker:~$  ping -c 3 server1
PING server1.f5demo.com (10.1.20.11) 56(84) bytes of data.
64 bytes from server1.f5demo.com (10.1.20.11): icmp_seq=1 ttl=64 time=9.73 ms
64 bytes from server1.f5demo.com (10.1.20.11): icmp_seq=2 ttl=64 time=6.21 ms
64 bytes from server1.f5demo.com (10.1.20.11): icmp_seq=3 ttl=64 time=5.88 ms

--- server1.f5demo.com ping statistics ---
3 packets transmitted, 3 received, 0% packet loss, time 2002ms
rtt min/avg/max/mdev = 5.880/7.277/9.736/1.744 ms
f5student@attacker:~$


Register DHD Device with Silverline
For Silverline signaling we will be leveraging both the DHD built-in signaling, as well as bandwidth utilization reporting for Hybrid DDoS protection.
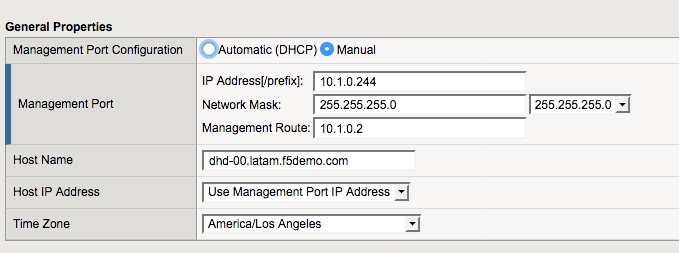
Go to System-> Platform menu and change the hostname as below. This will make easier to identify alerts from your particular device in the Silverline Portal. When finished, click Update.
dhd-[student#].latam.f5demo.com
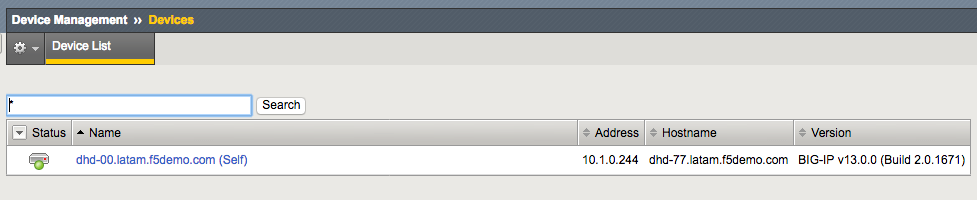
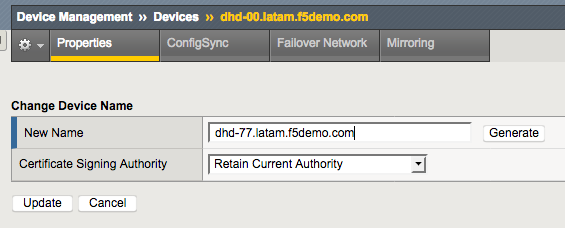
In Device Management->Devices select the device and then click Change Device Name.
Update the device name to match the hostname you have chosen. Important: Use your student number.
Open a terminal sesson with the Hybrid Defender and restart services:
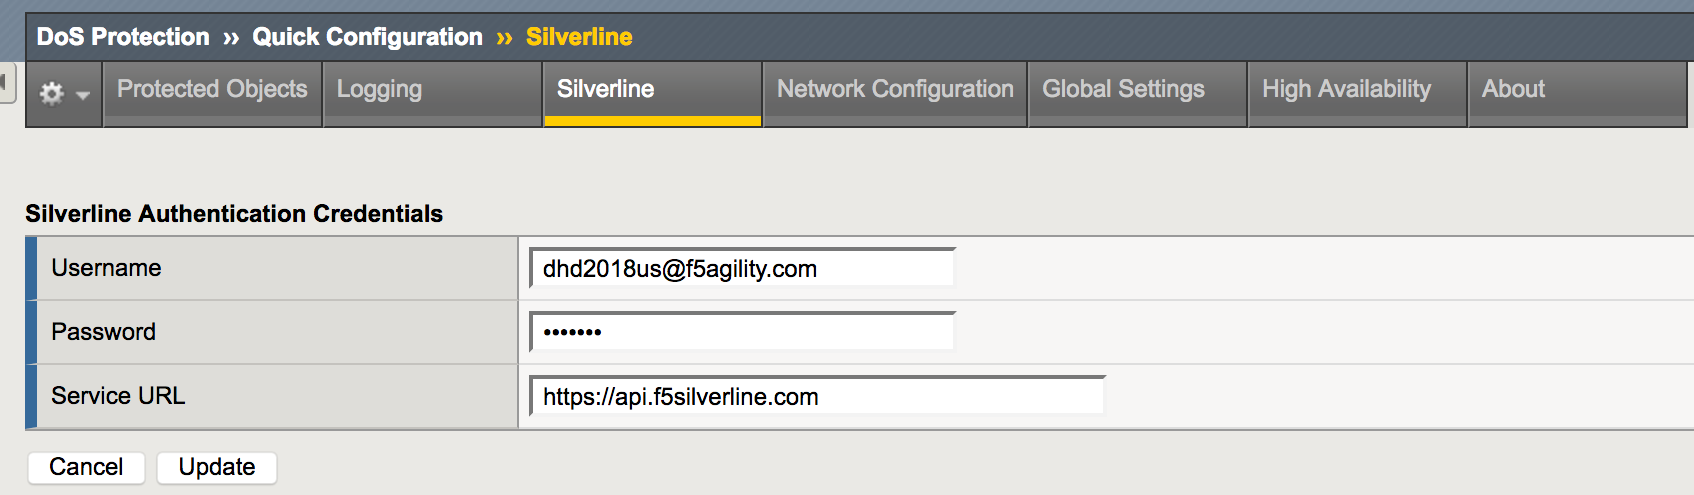
bigstart restartNow proceed with the Silverline registration. Go to DoS Protection-> Quick Configuration-> Silverline. Fill out the Authentication Credentials fields as follows, then click Update.
username dhd2018us@f5agility.com password [will be provided] Service URL https://api.f5silverline.com
Hint
That screen provides no feedback when the authentication actually works, so no worries. Go to the next step unless you got an error message here.
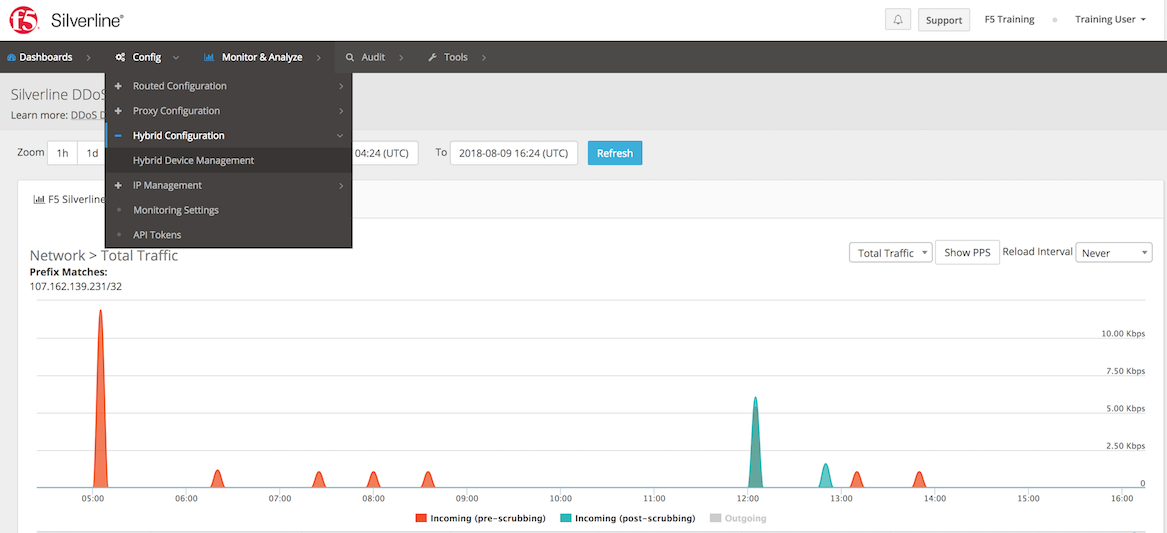
From another tab in your browser, access the Silverline Portal https://portal.f5silverline.com using same DHD admin account.
Navigate to Config-> Hybrid Config-> Hybrid Device Management
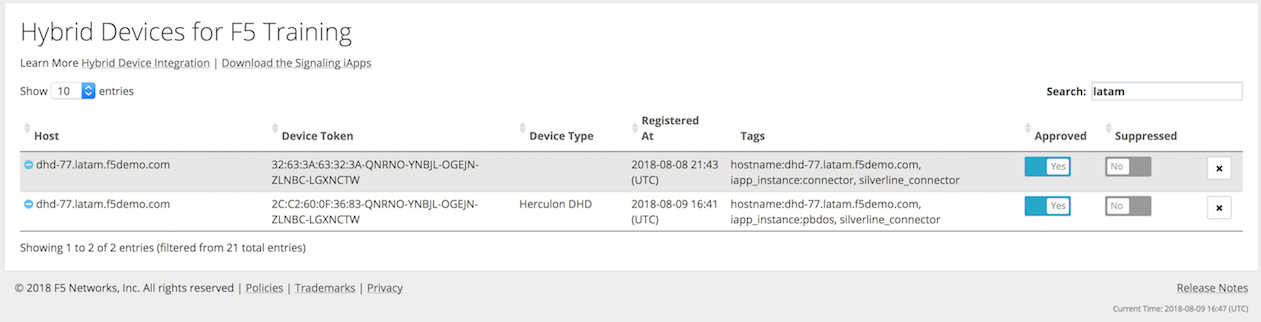
Enter the hostname of your DHD device in the Search field. Verify that you have both registrations. Approve them and you’re done!