Lab 5 - Bad Actor Detection Demo
In this demo you will run an attack from specific IP addresses. The Hybrid Defender will be configured to perform bad actor detection, limit the attack on a per-IP basis with more aggressive thresholds and then, based on this detection, automatically blacklist the offending IP address adding them to the (hardware-accelerated) dynamic blacklist
Task 1 - Open the following tabs in the DHD UI:
- DoS Protection->Quick Configuration->ServerNet
- Security->DoS Protection->DoS Overview (leave filter at default: “DoS Attack”)
- Statistics->DoS Visibility
- Security->Event Logs->Network->IP Intelligence
Task 2 – Configure the following UDP Flood vectors for ServerNet:
DoS Protection->Quick Configuration->ServerNet

Access the Attacker system CLI and run the UDP flood attack:
# sudo bash
# cd ~/scripts
# ./udp_flood.sh
From the menu, select ‘1’ to start the attack
root@attacker-a:~/scripts# ./udp_flood.sh

1)Attack start
2)Attack end
3)Quit

# ?
Note
This attack is relatively short-lived. You can launch it again if the attack ends and you are not finished showing the various reports. Simply type ‘1’ again, to re-run the attack
In the Hybrid Defender UI, show the Security > DoS >DoS Overview page. Note the blocks by Bad Actor.

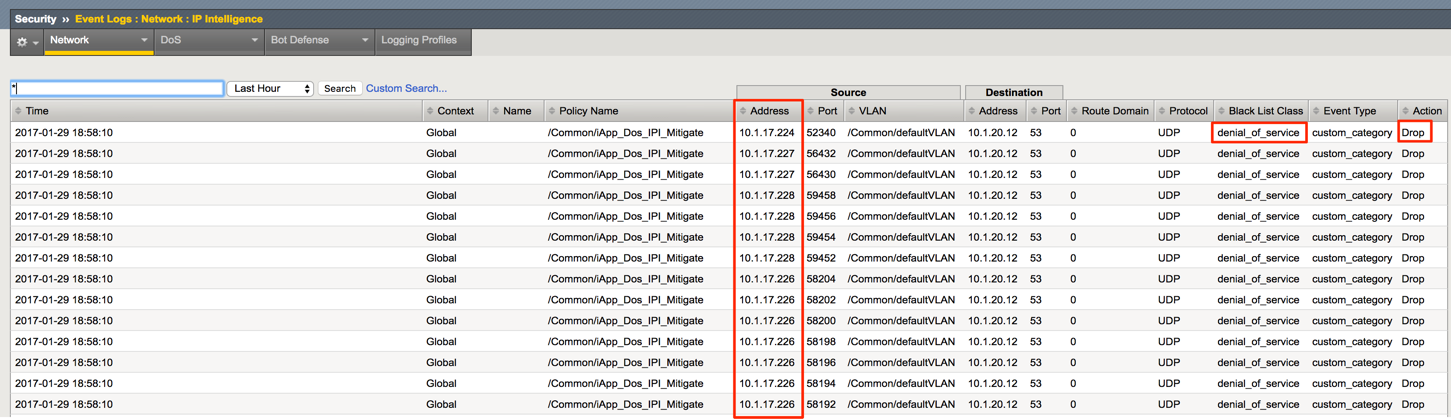
In the Hybrid Defender UI, show the Security > Events > Network > IP Intelligence Event Logs. Note the IP addresses that are being added to the denial_of_service blacklist.
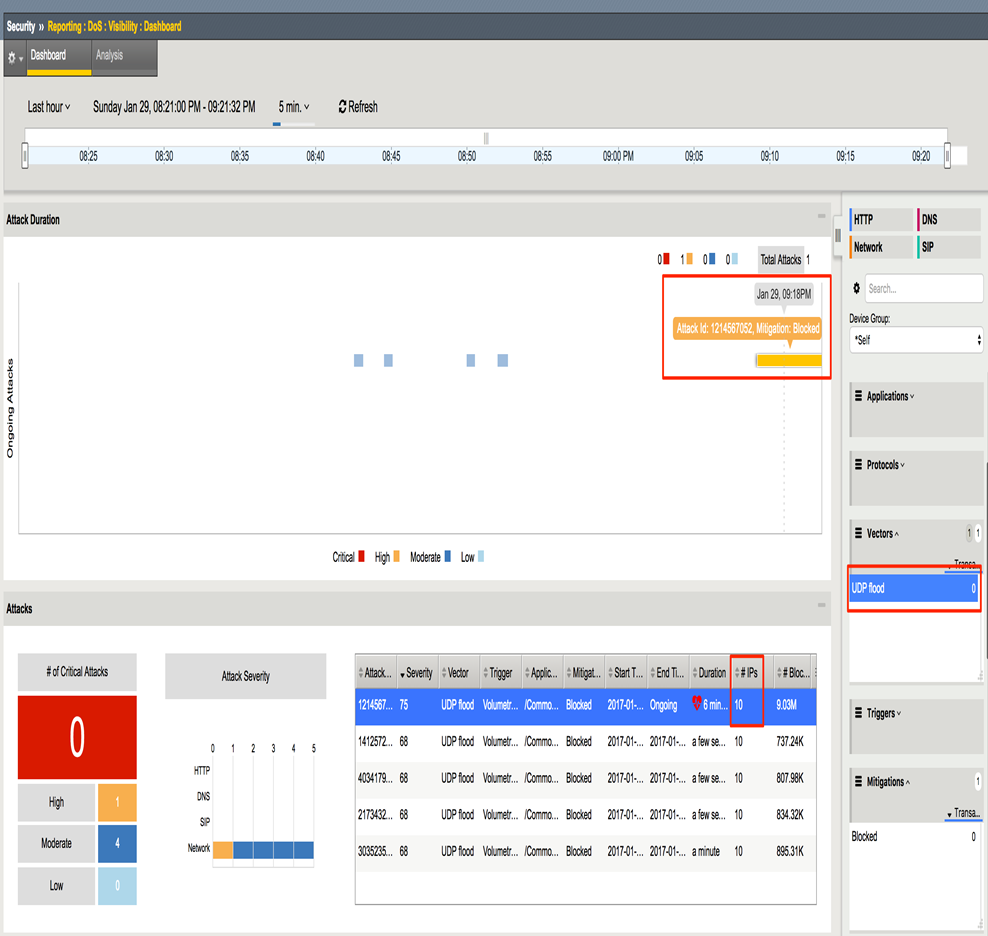
In the Hybrid Defender WebUI, show the Statistics > DoS Visibility. Expand the Vectors inspector and select UDP Flood. When it updates, select a flood from the timeline. Note in the Attacks panel the #IPs blocked is 10.
From the menu, select ‘2’ to end the attack
or
# sudo bash
# killall -9 hping3