Lab Topology & Environment
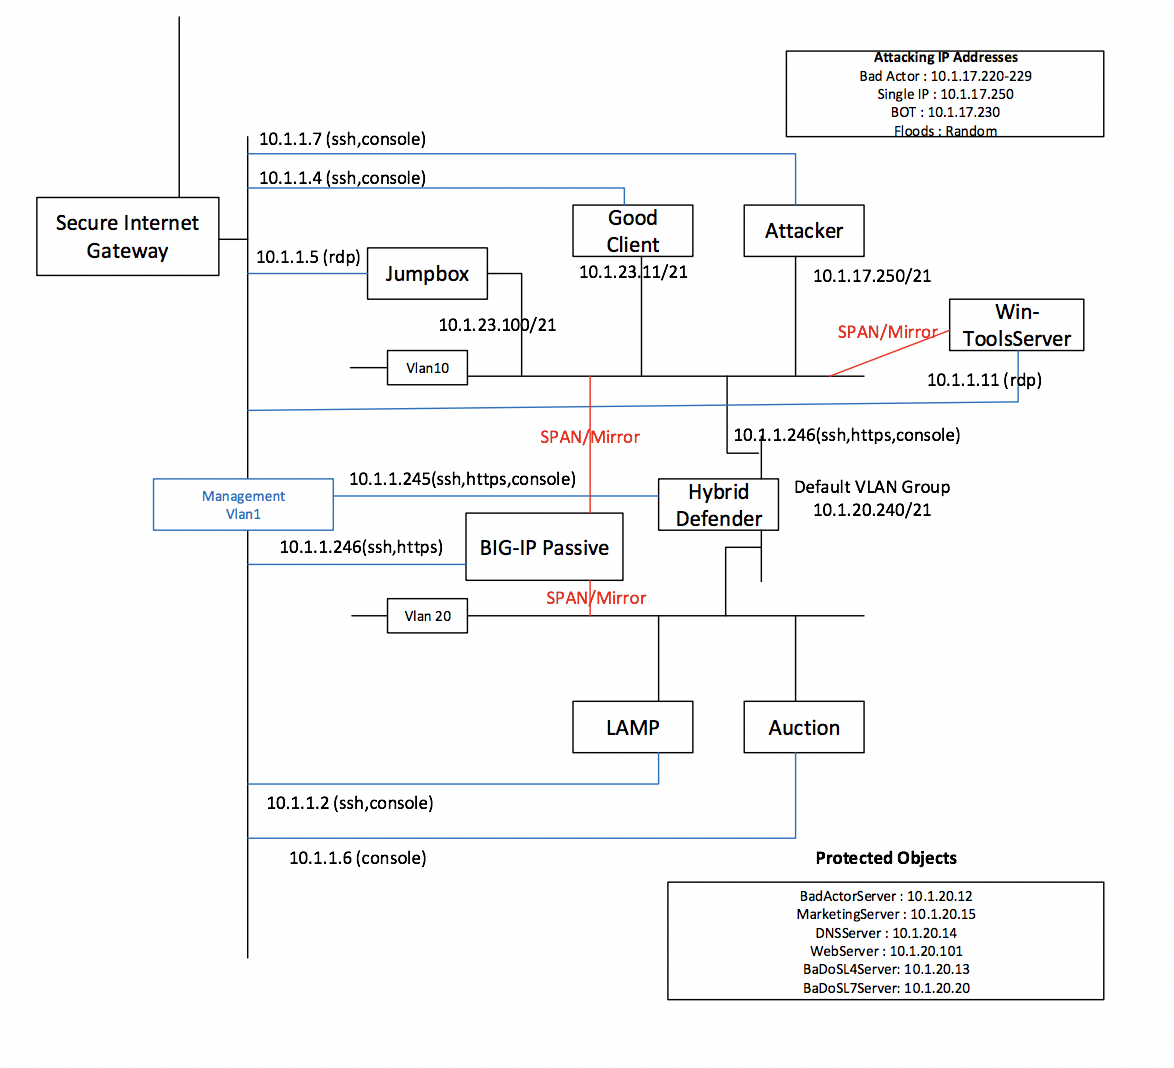
Access and Credential Summary
You will be using the Win7 JUMPBOX to access other systems for all labs. You will use Putty that has been preconfigured with appropriate keys to access the Good Client and the Attacker systems. To run scripts, you will need to have root access, requiring you to ‘sudo bash’ before running attacks, baselines, etc.
| System | Username | Password |
|---|---|---|
| Jumpbox | external_user | f5DEMOs4u |
| Hybrid Defender – WebUI/TMUI | admin | f5DEMOs4u |
| Hybrid Defender – CLI | root | f5DEMOs4u |
| Passive BIG-IP – WebUI/TMUI | admin | f5DEMOs4u |
| Good Client | ubuntu | Use key |
| Attacker | ubuntu | Use key |
| Win-ToolsServer | external_user | f5DEMOs4u |
| WebServer / Auction Server | root | default |
Helpful Tips and Tricks
Here are a few tips that you can use during the labs. Since the environment and all its components are running in a virtualized environment with limited shared resources you may encounter some slow performance.
- When using the Wireshark tool, it will capture a lot of packets. During DDoS attacks the tool will be overwhelmed. Its recommended that you start the capture and then stop it soon so that you can view the data captured easily.
- If you find that you are not seeing any attacks then go back and check if the Attack you launched is still running. If it has stopped, kindly relaunch it.
- If an attack is not being detected on the DHD check the value of your detection threshold EPS. For an attack to be detected this value must be lower than the attack being launched. Similarly, the rate/leak limit value sets the threshold for dropping the packets.
- During automatic/behavioral mitigations labs there is about 10-15 minutes of baseline traffic learning time for the Hybrid Defender. Use that time to ask questions, chat with F5 Engineers and/or your peers about DDoS mitigations, security and what they are doing in their organization. Additionally, browse around the DoS Visibility tool to see some cool graphical reports that were generated.
- Make sure the name of the Protected Objects you create in various labs matches exactly to what is provided in this guide otherwise the scripts/commands for monitoring learning status will not work as they are tied to specific profile names that get created.
- You will notice that the commands “sudo bash” “cd f5agility” are included in each step. If you are already logged in and have root privileges and in the f5agility folder then kindly ignore those steps. If not, then use them. Basically, you need root level access to execute the scripts and be in the f5agility folder/directory.
- Since the WebUI/TMUI will look the same for the BIG-IP Passive and the Hybrid Defender device make sure that all mitigation/changes are being made to the Hybrid Defender only and the Passive device is used only for visibility.
- Don’t forget to use CTRL+C to break and stop the attacks so that you get better responses from various tools once you have enough data.
- When starting a new capture in WireShark always select continue without saving when prompted.
- Use Right click and “Open in new tab” to browse various DHD menus (Overview, Event Logs,etc) so you don’t have to go back and forth.
- STOP all attacks, good traffic baseline scripts after end of each lab before proceeding to the next lab.
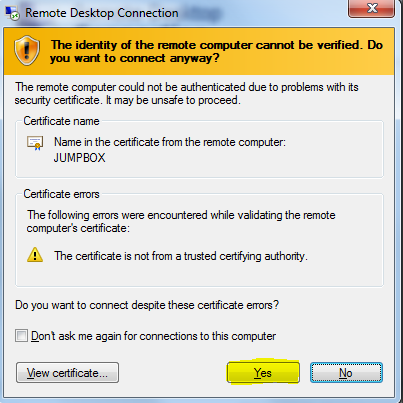
- Use the PuTTY shortcuts on the desktops to access various shells. The PuTTY window has a title on top so that you know which shell you are in. If you get a Security Alert for the Servers Host Key just click YES to proceed to connect to the shell.
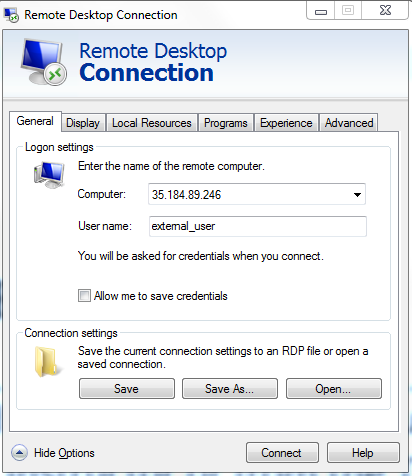
Accessing the Lab Environment
Use RDP client and connect to your Windows Jumpbox IP and the Win-ToolsServer IP
Note: Use the show options to provide
User name: external_user. Password: f5DEMOs4u
Click YES at the warning
All Exercises/Tasks are to be completed from the Windows Jumpbox. There are various shortcuts – Chrome Incognito, Putty shortcuts, on the Jumpbox that you will use through the exercises.